August 8, 2026
Repotting a Cattleya Step by Step: Rlc. Anna Balmores
Learn when to repot a Cattleya, protect its roots, and position its pseudobulbs in a new pot.
By Vigi
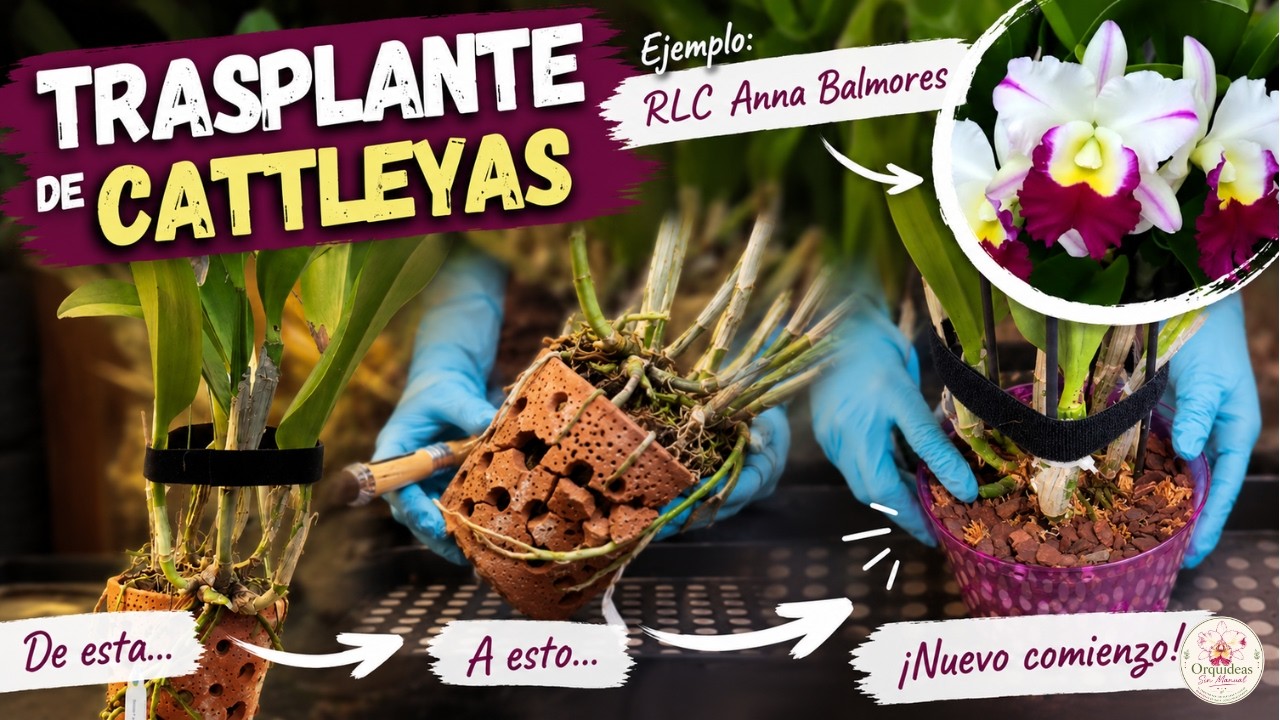
Repotting a Cattleya is not simply a matter of changing pots. Timing matters: deteriorated potting mix, new growth, or roots growing out of the pot are all signs that the plant should be checked.
When should you repot a Cattleya?
Check the plant when the old mix no longer drains or breathes well, when the roots have outgrown the pot, or when new growth is starting. There is no need to repot on a fixed schedule: inspect the plant and roots first.
In this Rlc. Anna Balmores, the mix had deteriorated, new growth was developing, and several roots were already growing out of the pot. Even a small accident that damaged the tip of a new root confirmed that it was time to inspect the entire root system.
Prepare your tools
Before starting, gather a suitable pot, fresh mix, clean water, a cutting tool, and alcohol for disinfection. Having everything ready reduces the time the plant spends out of its pot.
Cattleyas need an airy mix. The pot should hold the plant securely without being oversized, because a large volume of mix can take too long to dry.
The repotting process
- Prepare a clean pot, suitable mix, and disinfected tools.
- Remove the old mix carefully and inspect every root.
- If roots are attached to a clay pot, breaking the pot may be safer than pulling them loose.
- Rinse the roots gently and remove only dead or rotten sections.
- Position the oldest pseudobulbs against the pot wall, leaving room for new growth.
- Add mix without burying the pseudobulbs and secure the plant firmly.
A careful repot protects new roots and gives the Cattleya room to keep growing.
After repotting
Keep the plant in bright light, protected from strong sun, with good air circulation. Avoid keeping the mix constantly wet while the roots adjust, and watch for new growth before returning to a normal fertilizing routine.
The goal is not to make the Cattleya permanently immobile. It is to give it a stable base and enough room for new shoots and roots.
The repotting shown in the video
The plant is watered first so the roots are hydrated and more flexible. Because the roots were attached to the clay pot, the pot had to be broken rather than pulling the roots loose. The roots are then washed, and only dry, brown, or no-longer-firm roots are removed.
The mix is radiata pine bark and sphagnum moss blended together rather than placed in separate layers. Stakes are also prepared to help stabilize the plant while it adapts.
Key moments in the video
- 00:01:19: why Cattleyas should not be repotted frequently.
- 00:02:16: this plant’s signs: limited space, new growth, roots outside the pot, and degraded mix.
- 00:04:29: the repotting begins and the old mix is removed.
- 00:06:42: the plant is positioned in the new pot and the pseudobulbs are oriented.
For more preparation guidance, read Disinfecting Orchid Potting Mix, then compare it with repotting a Phalaenopsis.